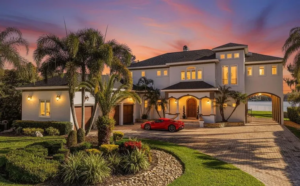
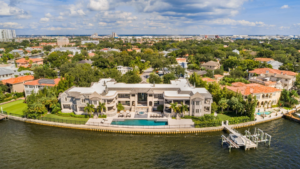
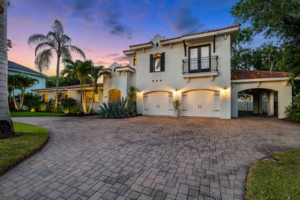
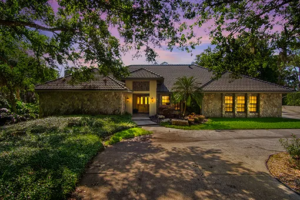
Looking at aerial photographs can be seen as obligatory in the real estate segment as the tool enriches property promotion and sales. Real estate salespeople, brokers, and agents can now use well-equipped drones that have the built-in ability to capture high-quality images of the property and its surrounding environments. Whether it is an estate or a condominium in the middle of a city, aerial photography gives the prospective client a clear view of the property’s layout, the location of essential amenities, and the surrounding environment.
Beginners Guide to Aerial Photography
Aerial photography is exciting and an excellent way to capture impressive scenes and beautiful landscapes. This beginner guide will properly explain the procedure for using a drone or helicopter.
The Right Equipment
- Investing in a drone with a quality camera is a wise investment. Consider flight time and camera quality.
- Gain an understanding of how to move the ISO, shutter speeds, and apertures to make adequate adjustments to sufficiently light scenes. Extra batteries, memory cards, and propellers will be needed when flying for an extended period.
Learn the Rules and Regulations
- Know the local laws and regulations that govern drone flights. You should also be familiar with privacy laws and any restrictions on drone flight, such as no-fly zones.
- Obtend the permits and permissions you need for restricted or commercial areas.
Plan Your Shots
- Use maps or satellite images to identify landscapes and points of interest.
- To get the best shot, consider the weather, time and day of the week, and lighting conditions.
Safety First
- Pre-flight check your equipment to make sure everything is in good working order.
- Avoid flying near airports and crowds.
- Avoid people, structures, and wildlife.
Practice flying
- Learn the basics of drone control by performing simple maneuvers.
- Fly in wide-open spaces before trying more complicated shots or flying in crowded places.
Composition
- To create visually appealing compositions, use leading lines and symmetry.
- Take unique pictures by experimenting with angles and perspectives.
Experiment With Settings
- Play with the camera settings to get different effects. Slower shutter speeds can cause motion blur on moving objects.
- In challenging lighting conditions, bracketing is a great way to capture more exposure.
Post-Processing
- As for post-processing, some color correction, brightness, and contrast improvement, as well as resolution enhancement, can be applied using Adobe Lightroom,
- Photoshop or any other equivalent program. Avoid over-processing; instead, try for a natural look to make the edits even more lively and appealing to the viewer.
Respect Privacy
- Avoid taking photos of individuals in private or sensitive areas.
- Consider cultural sensibilities and local customs before taking photos in different areas.
How Do You Expose For Real Estate Photography?
Properly exposing real estate photos ensures all interior and external spaces are accurate and well-lit. Here are some tips on how to effectively expose for real estate photography.
Use Manual Mode
Manual mode is usually the best way to control exposure settings. This mode lets you adjust the aperture, ISO, and shutter speed to match the lighting of each scene.
Metering Mode
Metering Mode Consider using the evaluative or matrix metering modes. These modes are handy for recording lighting variations in real estate halls.
Bracketing
Bracketing refers to taking several pictures of the same scene, each at different exposure values. This technique captures finesse in the highlight’s density and the shadow area’s darkness.
Protect Highlights
When taking interior shots with windows or other bright areas of the room, protect highlights from overexposure. This can result in darker shadows, but you can adjust the post-processing.
Use a Fill Flash or a Reflector
When the room has uneven lighting (for example, if there’s glaring natural light from the windows), use reflected flashes or fill lights to balance it. This will reduce the harsh shadows and lighten the room evenly.
HDR is High-Dynamic-Range photography
It involves blending different exposures to create a photograph with a balanced overall exposure. This technique is helpful in scenes with a stark contrast between the highlights and the shadows.
Midtones
When the room is well-lit, or the level of contrast is relatively moderate, capture details and textures in the scene using the midtones. You can use exposure balance for a strong and well-balanced effect without blowing out the highlight or underexposing the shadow.
Use a tripod
Stabilize your camera with a tripod to ensure sharp pictures, especially when using slower shutter speeds for the proper exposure. This eliminates camera movement and blur to produce crisper photos.
Histogram
Check the histogram to Verify that your exposure is balanced. The histogram should span the entire range of tones without clipping out highlights or shadows.
FAQs
How profitable is aerial photography?
The business opportunity that aerial photography provides also has its strengths and weaknesses. This depends on the ability of demand, competition, cost of equipment, and expertise. However, for those with expertise and skill in photographing the sky, taking good aerial shots for real estate, construction, tourism, and other similar sectors can be highly profitable.
What is the best camera height for real estate photography?
The ideal focal length for real estate photography may vary, but a typical range of 5 to 7 feet (1. 5 to 2. 1 meters) is ideal. This height ensures that the viewer has a typical vantage point that highlights the contents of the space without distortion. However, changes may have to be made depending on the various detailed floor plans and other characteristics of each room involved.
Is aerial photography expensive?
Yes the aerial photography can be cost effective mostly occasioned by more so by the cost of the equipment along the line including drones, and cameras among others. Drones of this high image quality range from $300 for the cheaper ones to $3000 for the professional ones – with the ability to capture high-quality images due to the inclusion of cameras. There is also logistics and functionality costs for drones, including a battery, memory card, and propellers. Additionally, acquiring CAA licenses for commercial aerial photography might also attract extra costs.
What MM is best for real estate photography?
Housing photographers use wide-angle lenses mainly for their versatility when shooting expansive property interior spaces. Lenses 16mm to 35mm are usually much used since the coverage area is more comprehensive and tends not to distort the room more.
Ideally, depending on their size, f/3.5-5.6 is suitable for most interiors, where the focal length of around 16mm to 24mm gives a broad area coverage while minimal perspective distortion occurs.
However, the exact lens type in the chosen range depends on factors such as the size of the room, the layout of the house, and the desires of the photographer.